Showing posts with label beekeeping. Show all posts
Saturday, April 1, 2017
Spring Inspection of the hives!
Going into winter I had three hives. If you recall from my post last fall, I was hopeful, but they were all in different stages and there are so many factors that come into play over our long winter months here in Minnesota.
Throughout late fall and early winter I would go up the hill at least once a month to just check and see if there was any signs of activity at the entrances. In February, I was very surprised to find Alveare (left) the shortest of the three still alive. I peeked inside Panj as well. Both hive's bee cluster were in their top box, which generally means they ate all their stores already. I set up mountain camp feeding on Alveare and Panj since they were the lowest on food. I left Kosnica knowing they should have had tons of food. They were active out front but I did not see bees on the top of the hive.
Going into March I checked Panj and Alveare two more times on how the feeding was going and if there was need for more. I added to Panj as they were eating it up really fast. They were definitely more active outdoors even when it was colder than the other hives. They would be flying outside even when I saw nothing with the others. Must be the Russian bloodlines. We had some up and down weather and checking the outside of the hives it appeared that Kosnica was most likely dead. I peeked inside and saw no movement. Late March I suspected that a cold snap may had also taken Alveare as I saw no movement and heard nothing when I knocked outside. Today I went in to look....
The above photo is from today's inspection the first day in April.
You can see Alveare (left) is shorter than the other hives. They had only two boxes going into winter and they were not full. It should have been a recipe for disaster. Upon opening them up today, they still had lots of feed on top and were very much alive! They are raising brood (babies) and taking in beautiful yellow pollen. My weakest hive going into winter made it!!! I am amazed at their resiliency.
On the other hand my Russians, Panj (middle) had eaten all the feed I had given them. More than twice as much as Alveare. They were raising brood and filling in the extra space for more! In the picture below is some of the burr comb I removed that they were building. It had eggs in it. You can see the little white dots. Those are bee eggs. Another thing to note is their hive was so clean. When I went to clean the bottom board there was barely anything there to clean up. These bees are really good bees.
Kosnica (farthest away, on the right) had a third deep box FULL of honey going into winter. They should have had enough food to last them until March/April easily. There was activity outside the hive but from my recent visits and outside observations, I was suspecting it was bees from other hives robbing the honey from inside. Upon opening the hive there was virtually no bees inside. The top box still was full of honey, easily eighty to one hundred pounds. It was tough to lift. I checked all the way down. No cluster. They were dead. Most of the bees were on the bottom board. I am suspecting moisture as a reason they may have perished. I had the bottom entrance open to the smallest opening and it should have been the three inch opening. They most likely did not get the ventilation they needed to be able to remove the moisture even with the moisture board on top.
It is sad to loose a hive but I am super happy to have the other two doing so well. I will be dividing the colonies in about a month from two to four. This will be a new venture and I will be happy to share when it happens.
That's the buzz!
Blessings!
If you enjoyed this post, I’d be very grateful if you’d help it spread by emailing it to a friend, or sharing it on Google+, Twitter or Facebook.
Labels:
apiary,
bee,
beekeeping,
DIY,
do it yourself,
honey,
life,
winter
Wednesday, February 8, 2017
Minnesota Beekeeping Mama, behind the scenes part 3: wax harvest and uses
The following is part one of a three part series I wrote for The Mother Hive last summer (2016), with a few updates and links. I hope you enjoy this behind the scenes look into beekeeping. If you are looking for honey or garden products feel free to check out my page at Good Karma Honey & Apothecary.
If you try it out, let me know what you make. I hope you have fun with it!
I used crush and strain method for harvesting honey so I had more wax than most would at the end of the season. I did not have any old windows laying around but did find an electric roaster oven at a garage sale so I decided to use that to clean my wax. Here is a breakdown of how I cleaned my wax to get it ready for use.
- I placed all my wax in a 5 gallon bucket. I added water and let it sit for a while to help dissolve the honey.
- After it sat for a few hours I mixed it well and broke up any chunks which could be hiding honey.
- I strained the wax through a metal strainer and rinsed as about two more times to really clean it up. (I did this all outside... it's a really messy job)
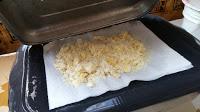
- I setup my roaster with about 1-2 inches of water in the bottom. I used metal window screen and cut a piece of screen to fit over the top and tucked it under the inner liner of the roaster.
- I placed a few paper towels on top of the screen. Then wax on top of that. I covered it and let it sit and roast.
- I kept the temperature low (around 110-120) as I did not want to heat up the wax too much until I found a temperature that melted the wax and allowed it to filter through the paper towel and drip into the water bath below.
- The paper towel caught all the gunk. I would add more wax as the wax melted through.
- Once all my wax was filtered I turned it off and let it cool so the wax would harden in the water below.
- Once hard you can break it loose. The wax was beautiful and smelled wonderful. From one hive I ended up with over seven pounds of wax using this method. I broke it into pieces and put it into a bag for use to make chap stick, lotion, candles or whatever else I choose.
I love to create homemade beauty products. Two of my favorites uses for beeswax beauty products are chapstick and lotion bars.
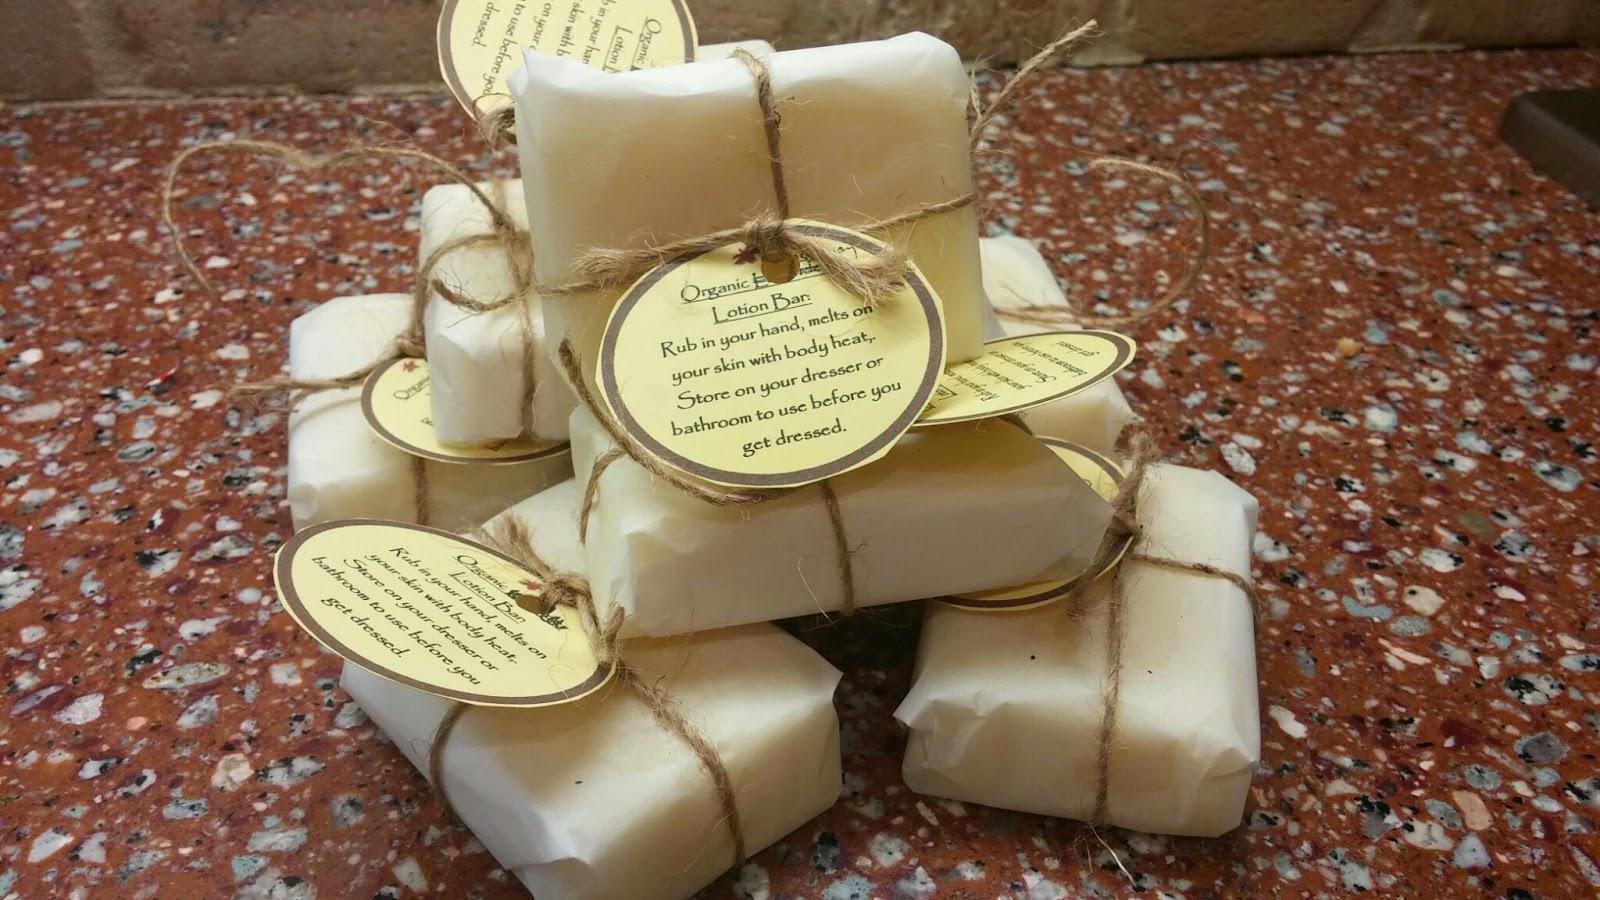
Lotion Bar: I have been making these for years. I just love them and give them as gifts to all my friends and family. They are great for dry skin. Rub them in your hands and the heat from your body will melt the oil. These bars are very moisturizing. I get cracked skin along my finger nails in winter and I will rub my lotion bar on the cracks at bedtime. By morning the crack will be gone. Happy dance!
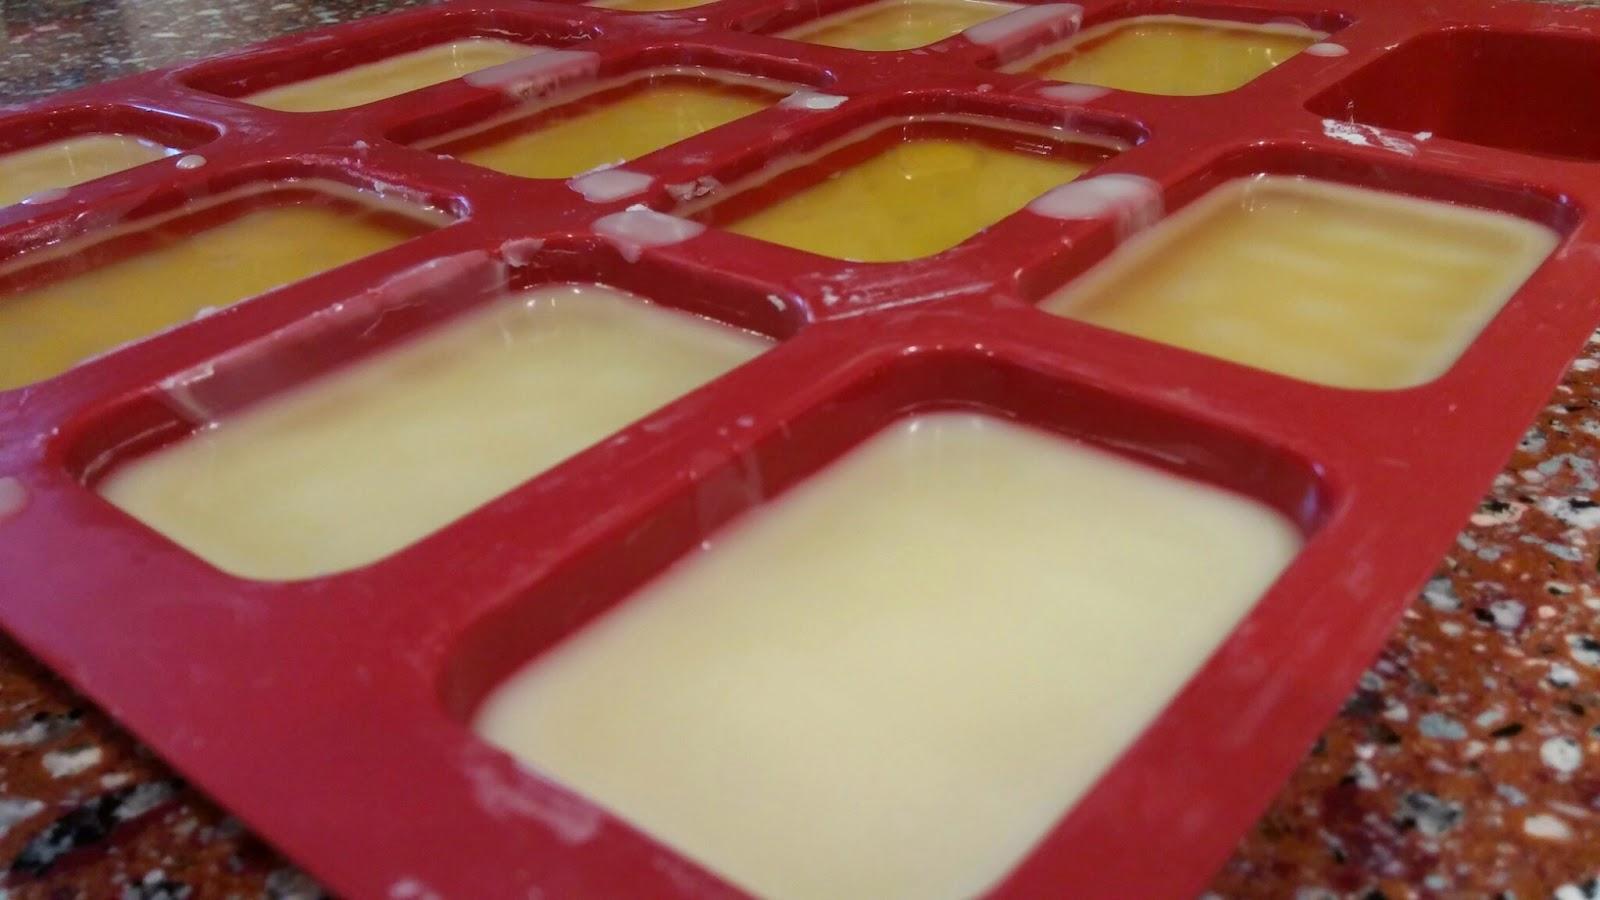
You can use lots of options to make this with different molds. I use a small loaf silicone mold but you could make hearts for Valentines or pour them into deodorant containers for easy use as well!
You will need:
1 cup beeswax
1 cup mango butter
1 cup coconut oil
1-2 tsp vitamin E oil or about 5 capsules of vitamin E
50 drops of essential oil
In a double boiler melt the beeswax, mango butter and coconut oil. Once melted, remove from heat and add Vitamin E and essential oils. Then pour into molds. Let completely cool before removing from mold or if using deodorant containers make sure its cooled completely before adding the cap.
This project takes about 30 minutes to prep and get into the molds. Most of that time again being the melting of the oils. Using the mold above I generally get 10-11 bars.
Chap Stick:
You will need:
6-7 lip balm tubes
1/2 tablespoon beeswax
1 tablespoon Shea butter
1 tablespoon coconut oil
2 capsules or 1/2 tsp vitamin E oil
10-15 drops essential oils of your choice (like lavender, or lavender and peppermint)
- First melt your beeswax, coconut oil and butter in a double boiler.
- Once melted remove from heat and add vitamin E and essential oils. Stir well.
- Gather your lip balm tubes with a rubber band for ease of filling. Slowly pour the balm into your tubes. Let it cool completely before capping.
- Add cute labels or use decorative tape.
This is seriously so much fun. There are so many natural color combinations and essential oils you can choose from. For instructions on how to color your chapstick check out this post: Everything's better with glitter lip balm
If you try it out, let me know what you make. I hope you have fun with it!
If you would like to follow me and my journey with the bees and other fun stuff you can follow me here on the blog. Click on the follow button and you will be notified when new posts are up!
Labels:
apiary,
bee,
beekeeping,
chapstick,
crush and strain,
harvest,
hive,
honey,
lotion,
lotion bar,
wax
Minnesota Beekeeping Mama, behind the scenes part 2: crush and strain
The following is part two of a three part series I wrote for The Mother Hive last summer (2016), with a few updates and links. I hope you enjoy this behind the scenes look into beekeeping. If you are looking for honey or garden products feel free to check out my page at Good Karma Honey & Apothecary.
So it's time to harvest but do not have the funds for an extractor? Does the idea of hauling your supers somewhere to extract them sound like insanity? Well, it did for me. So I decided to use crush and strain. Crush and strain is a bit more labor but I really do not think it is THAT much more.
First I want to say, there are many different ways you can do this. I am going to share with you what I did and you can decide how you want to adjust it to fit your needs.
Location: I would recommend you choose a place that is REALLY warm.
I decided to do all my crush and strain in my greenhouse type garden shed. It gets very hot in there and is closed off from the bees so I will not be bothered. I know many who do it in their garage or even in their kitchen. It is messy work so be prepared for a mess. I thoroughly cleaned the area and put down clean cardboard on all surfaces for easy clean up afterwards. This setup worked wonders for me. The biggest factor was temperature. If it was below 90 degrees the honey did not strain. It worked best for me to harvest ten frames early in the day and let it strain as it heated up. As long as it was above 90 degrees the honey flowed very quickly and easily.
Tools: I used a 5 gallon bucket with a honey gate, a bucket strainer, scraper and a jig I made to hold the frames.
To scrape I found it worked best to use a square spatula. I tried with a round wooden ones but it could not get the comb from the corners. I found a square wooden one I really liked at Target for cheap.
I made a little wooden jig to hold my frames over my bucket while I scraped the comb. It is a simple piece of wood where I cut grooves so it would fit on the top of my buckets without sliding. I put a screw in it pointing upwards to hold the frame while I scraped.
I used a 5 gallon bucket with a honey gate to strain the honey into and to also dispense my honey into jars once I was done. I placed the bucket strainer on the top, then my wooden jig. I would stand a frame on end and scrape it into the strainer. Flip it around the scrape the other side. I could fit about 5 frames of honey in each strainer. I used two buckets and would do ten frames a day. Then I would bring the frames back to the bees to have them clean them and take ten more. It took me about two weeks to get it all done this way. There were a few days where the weather was not warm enough which slowed things down. It may be wise to have more buckets so I can take advantage of the warmer weather when it is here.
Some additional things I learned from doing this...
1. It is best to wait to bottle your honey until you are done. If you have some frames that are not completely capped they can mix with the capped honey to still ensure your moisture content is within limits. I had a refractometer to check the moisture content.
2. To get the maximum honey out of your combs you should squeeze it out when you think it is done straining. There is still a lot of honey in there. I know I missed a lot of honey in the first 30 or so frames because I did not try squeezing until my last harvest and was surprised at what came out!
3. Because I had multiple buckets of honey I was able to really see the difference in honey that the bees collected over the season. The supers from the end of the summer were darker.
If you would like to follow me and my journey with the bees and other fun stuff you can follow me here on the blog. Click on the follow button and you will be notified when new posts are up!
Labels:
apiary,
bee,
beekeeping,
crush and strain,
harvest,
hive,
honey,
wax
Minnesota Beekeeping Mama, behind the scenes part 1: hive set up
The following is part one of a three part series I wrote for The Mother Hive last summer (2016), with a few updates and links. I hope you enjoy this behind the scenes look into beekeeping. If you are looking for honey or garden products feel free to check out my page at Good Karma Honey & Apothecary.
Greetings from Minnesota! Summers here are easily a 100 degree difference than cold long winters. Due to our short season and extreme weather, beekeeping practices here are certainly slightly different than southern United States or other countries.
I am in my third year keeping bees in Minnesota. My first year hive did not make it, they were killed off by an environmental spray late fall which was really sad to me. I harvested a hundred pounds and had a hundred in the hive for them to winter with. But I was determined to try again and the second year I had three hives. They really tested me the second year but all made it. We are now into the winter of the third year, the hives are all cozy and we keep praying they will all be there come spring!
I am a wife and mother of two young kids. The kids love the bees and especially the honey. They are caretakers of the fallen. Whenever they see a bee out in the yard they instantly want to help it or save it. My husband got involved late the first summer as the lifting was more than I could handle. Now he too finds himself loving these special tiny little insects.
I would like to share a little bit about how my hives run for our season and weather. Stands for our area are recommended close to the ground, just a wooden 2x4 stand. I keep my hives running with three deep boxes. Two deeps are for brood. The top one is mostly honey stores for winter. Some people in the area run two deep boxes but many use three. If I could have known how heavy the full deeps would have been I may have looked into eight frame boxes or more mediums. I can not lift the top deep once its full. I have to remove frames to lift it, or more easily have someone there to help.
I use a queen excluder and honey supers for a few short months. Generally honey supers are on mid-June until to the beginning of September. Our honey flow is over around labor day and generally we harvest around that time. Because I do not have that many hives I decided to skip the extractor ($$) use the crush and strain method. I will share more details on that in another post.
In late fall we wrap our hives to help them over winter. This is done in many ways. Some people purchase pre made black cardboard wraps, others use two layers of roofing paper and still others get even more creative. It is also recommended to put up a windbreak in winter to help with the cold northern winds. Our biggest problem in this area is varroa mites. Besides that some people also have some problems with bears if they are farther out or smaller critters like raccoons.
If you would like to follow me and my journey with the bees and other fun stuff you can follow me here on the blog. Click on the follow button and you will be notified when new posts are up!
Friday, November 18, 2016
Thats a Wrap - wrapping up the bee year
So many people say...."What do your bees do in the winter? Do they hibernate? Do you send them down south?" Nope. They stay right where they are. But before I get into that let's do a quick update.
- I started this year with three new packages. Getting them all in their new homes was quite an adventure. One of my queens flew off and I was hopeful that she returned.
- Once I realized that she was gone and I did indeed have a laying worker, I was faced with figuring out how to get a new queen accepted into my hive. Laying workers are hard to correct but I was able to get the hive (Alveare) to accept their new queen. She was very far behind in growing her colony for our short season here in Minnesota.
- While I was worrying about her, one of the other colonies (Kosnica) swarmed on me. They were so sneaky in hiding their plans to swarm. Once it happened I was helpless as they were not taking any of my bait to get them to stay.
- Several weeks later I am happy to say they were able to make a new queen. While I was ever so patient (NOT) I made some markers for my hives to dress them up a little. I found the new queen was laying and all was right in the world again. Well, as much as it could be given the circumstances.
How's the honey? Sweet! But with all of this going on, it definitely puts a damper on the bees honey production. When there is no queen the bees do not bring in nectar which equals no new honey. The only one of my hives who was not having a queen controversy this year was the hive which had the Russian line of honey bees (Panj). Russians do not make as much honey as Italians and that was evident when it came to harvest time. The only hives I was able to get honey from were Panj and Kosnica. I was able to collect a total of about 50 pounds of honey between the two.
We had a nice warm fall. Alveare was still small and not storing much. I was feeding them in hopes to help them to survive the long winter here. They gladly took the feed but instead of storing it, they kept growing the colony size. Alveare is only two boxes deep and does not have much honey stored for the long winter ahead. Those babies eat a lot. Only time will tell if they make it this winter.
This fall, my son really enjoyed coming up to help with feeding. This week was our last warm weather in the forecast. We are due for a winter storm and the bees will not take sugar water when i'ts cold. I had to take the feeder off Alveare and wrap all the hives for winter.
What is wrapping the hives?
Wrapping the hives is just one step you can take to help the honey bees survive our harsh northern climate. I had one winter wrap I used on Alveare (far left). This is a pre made cardboard wrap that is painted black on the outside. The other two were wrapped in roofing paper. This black exterior helps to heat up the hives in winter when the sun beats down on them. The trees and brush behind the hives aid in blocking the harsh northern winds in winter as well.
Are they completely closed? Nope. There are two doors for them to enter/exit all winter long. Honey bees do not relieve themselves in their house, so they need to get out when its time to go. I have one in the bottom of the hive and one on the top box of the hive for if the snow covers up the bottom entrance.
You can see Alveare (left) is shorter than the other hives. Hopefully we will have some warm days each month this winter so I can check on them and sneak in some emergency feed as needed. Panj (middle) had fairly good stores, the third box was not completely full so I will be checking in on them come January or February if we get some warm days. Kosnica (right) had a full third deep box and although I will check on them in February if I am up there I am thinking they should have enough food to last them until March/April.
So as I was turning to leave, I tapped them on the top and said good luck girls! Its all up to you now!
That's the buzz!
Blessings!
If you enjoyed this post, I’d be very grateful if you’d help it spread by emailing it to a friend, or sharing it on Google+, Twitter or Facebook.
Subscribe to:
Posts (Atom)