Showing posts with label young living. Show all posts

Thursday, April 6, 2017

Green your Clean Series! Laundry room

Let's get real. Cleaning is one of those things either you love or you don't. I do not like to clean but I hate a mess. What a predicament?? I really want to challenge you (and myself) to look at the products you use around the house to clean and to try something new.

Lets start off this Green your Clean series in the laundry room.

Confession time... I used to be a fabric softener-aholic (yes that is a word). I used several dryer sheets and liquid softener! I had no idea what horrible toxins I was absorbing by putting on my (and my family) clothes daily. The chemicals found in fabric softeners are known neurotoxins, hormone disruptors, allergens, asthmagens and carcinogenic. Just Google it... no lie. You will be a bit overwhelmed. Needless to say, I stopped several years ago and went green. Lets talk about options.

Option 1: Vinegar
Several years ago, I went cold turkey. I changed over to using vinegar in my rinse cycle. In my old washing machine I would add it at the end or use my old dryer ball (until I decided to give that old thing up too). Then I got a machine that had a fabric softner dispenser so it was a no brainer. Pour my vinegar right in there- easy peasy.  Super cheap and soft clothes. Its been about five years now and I have not had any problem with static. Honestly, I can no longer stand the smell of laundry softener. I went through some old bins of clothes last summer that were from way back in my softner days and I just about choked on the smell.

Option 2: Wool dryer balls
Another option is to use wool dryer balls. They help speed up the dry time, soften, decrease static and can also be used with essential oils to add a scent to your laundry. 

I recently made some and was amazed at how easy it was! I have been leaving them in my dryer to help speed up the process (save energy). My clothes have certainly been drying faster.

You need to buy the kind of wool that is not made for washing so it will felt. No blends. I used two skeins of roving wool to make six balls. Super simple. You wind them into tight balls. Once you get the size you want, cut the yarn and tuck in the end.
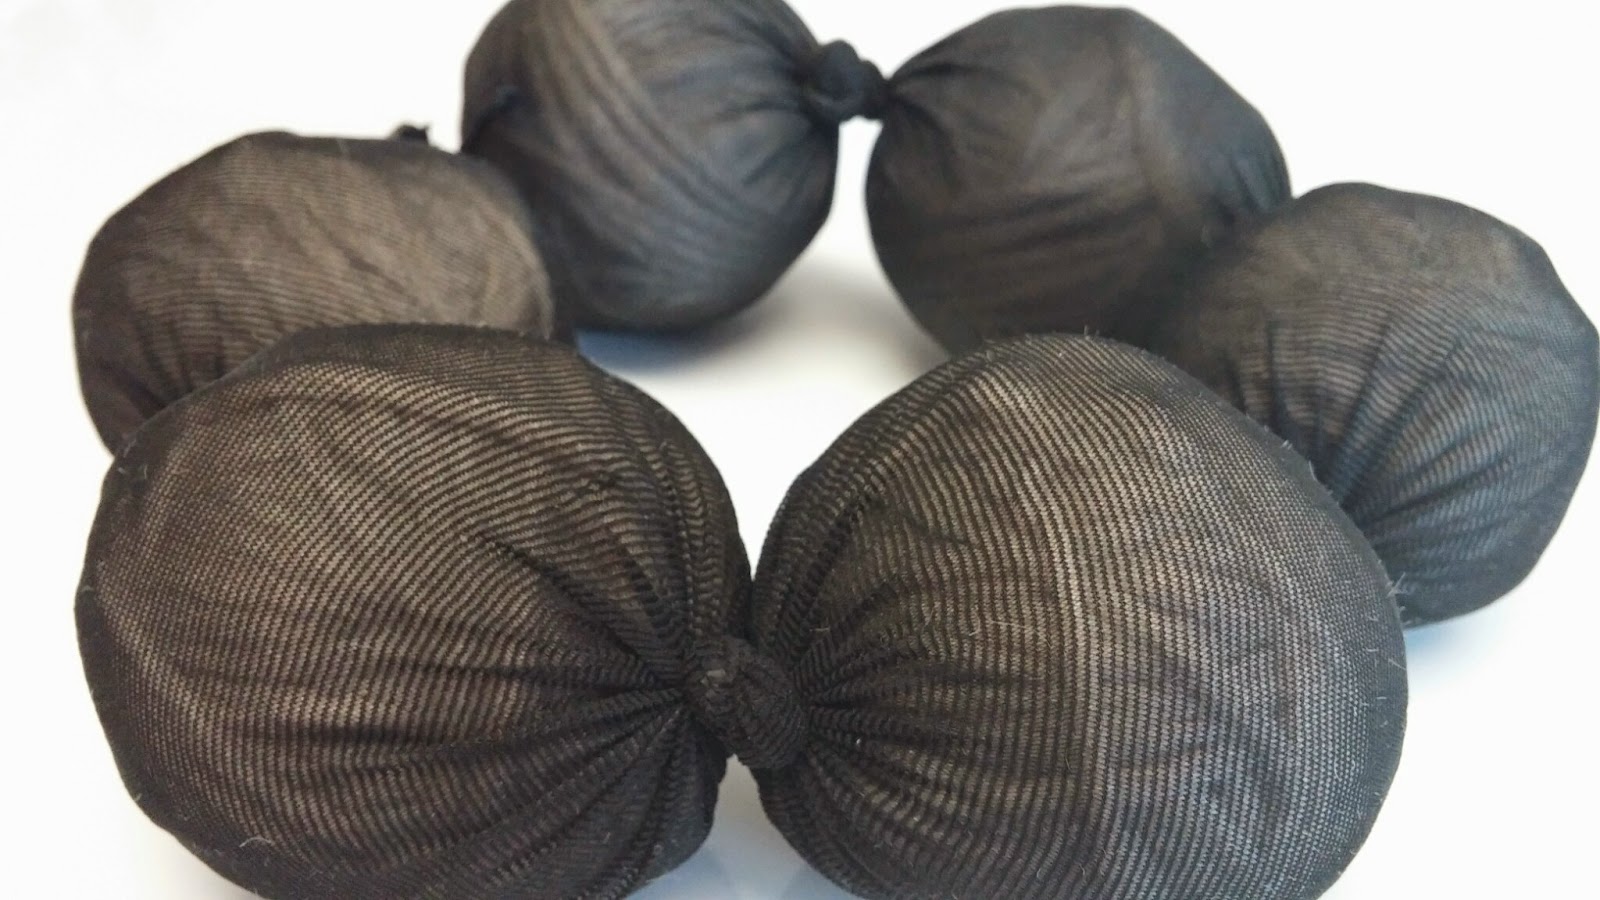
Then you place them into old pantyhose and tie them off. Put them in with the wash and dryer for a few loads. Then remove them from the pantyhose. They should be felted. (You should  not be able to pull the strings apart.)

They are so cute and simple! If you want to add scent just add 3-4 drops of essential oil right onto each ball. You can add more or less depending on the level of scent you desire. Lavender or purification are great ones to start out with but the possibilities are endless.


Option 3: Home made dryer sheets

This one is the newest of the three I am trying out. My cousin has been using these for awhile and highly recommended them. I quite honestly love the smell! Seriously, it is so simple to make your own dryer sheets.
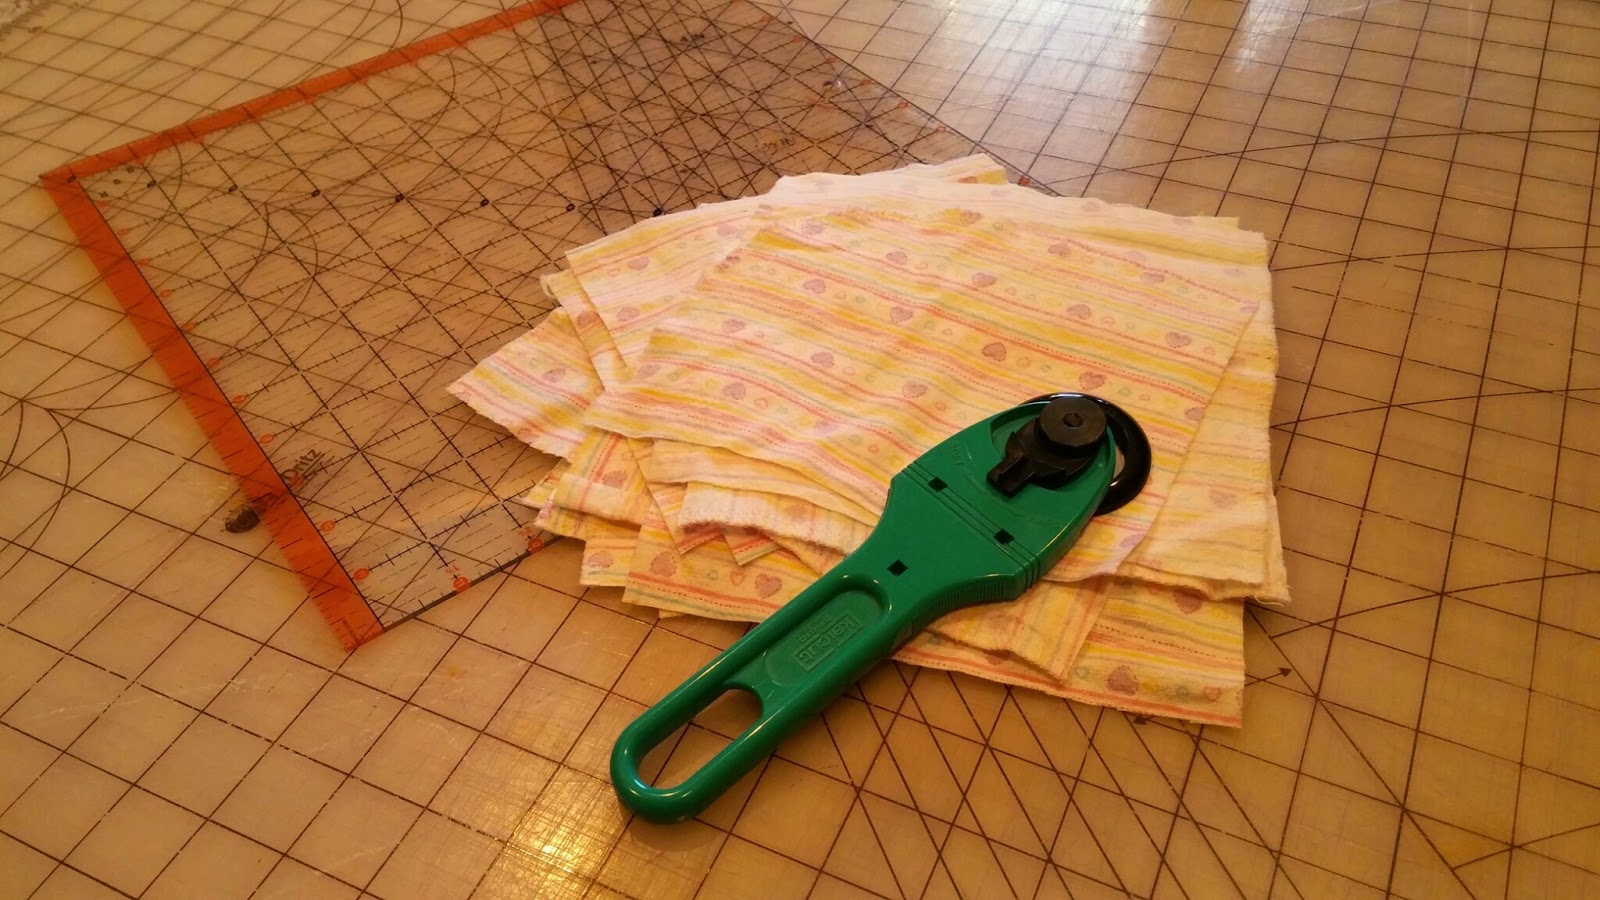
I had several receiving blankets in the donation pile. So I decided to use one for this project. You can also use old flannel sheets or t-shirts.  I cut them into squares. But generally dryer sheet size around 6x6 is good. Nothing fancy, just chop chop.
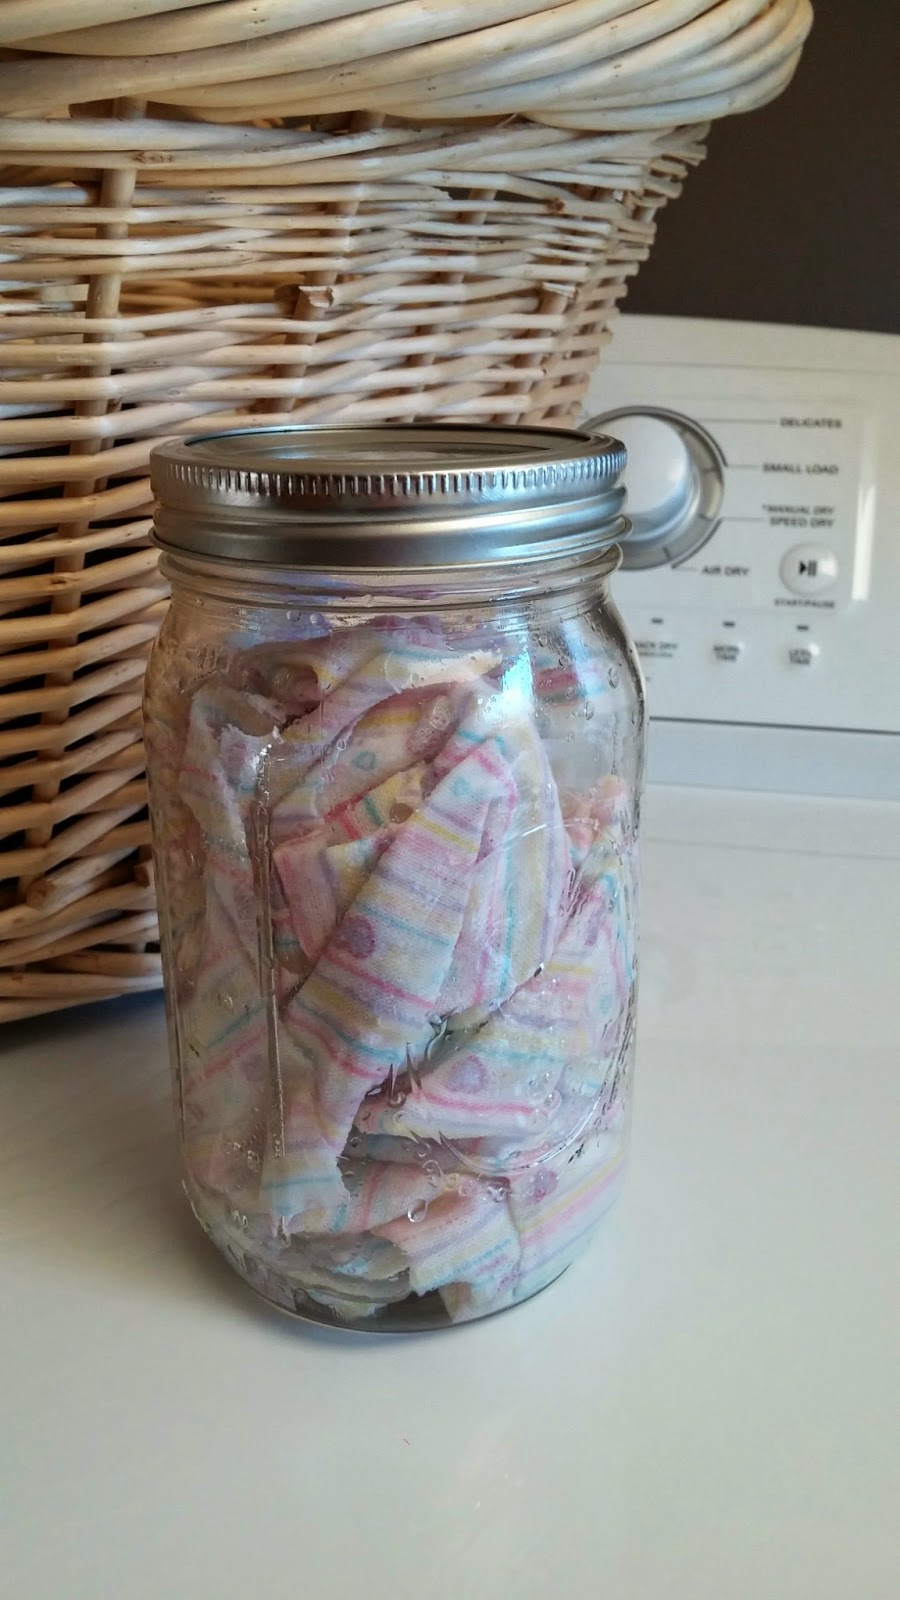


Stuff the pieces of fabric into a mason jar. In a separate bowl mix one cup of vinegar and 20-30 drops of Young Living essential oils then pour over fabric. Make sure oil mixture is evenly distributed over fabric, then shake to distribute.


Add a cloth or two to your dryer load, then throw them back in the jar. You can reuse them as much as you want!


So there you have it... three easy ways you can green your clean today! Try one out and let me know what you think! I will be back with more ways to clean up the toxins soon.

Blessings!

If you enjoyed this post, I’d be very grateful if you’d help it spread by emailing it to a friend, or sharing it on Google+, Twitter or Facebook.


Sunday, September 25, 2016

No diffuser? Try a Pillow Mist for a Great Night Sleep


My son was a horrible sleeper! Before he got his own "confuser" (that is what he calls his diffuser), he absolutely loved this pillow mist. He would spray it on his "blankie" before bed every night.

He did not show a huge response to the sleepy time roll on we made. He liked to use it but it did not change his sleeping patterns. He did much better with the spray. We started with just Lavender. He was sleeping better but still waking crying (we thought it was really bad dreams). I did a little research and decided to try adding White Angelica. Yeah! No more night terrors. He would still wake up but he was not crying with terror. Mostly there is no crying at all. It was more to do with wanting to have his Daddy next to him than it is not wanting to sleep or having a night terror. So here is what I made:

I use a 4 ounce glass bottle for his spray.

1.   Fill about 1/2 way or 2 oz. with Vodka
2.   Add 2 oz. distilled water
3.   Add 4-5 drops vegetable glycerin
4.   Add 15 drops Lavender Essential Oil and 15 drops of White Angelica
5.   Screw top on and shake a little to mix

Now he is a little older and has his own diffuser. He still uses his pillow mist occasionally but he gets the same aromatic response with his diffuser. He loves his "confuser" and turns it on all by himself each night. We bought him a spill proof one which is perfect for kids and the bedside.

How about you? Do you have a diffuser? If not, have you tried other ways to use your oils aromatically? If you want to learn more about how to use essential oils let me know. I teach classes in person and online regularly and would love to have you join us! If you are ready to jump in with oils I would love to help you. It is super easy just click on this link...Sign up for Young Living Starter Kit Here


Blessings!

If you enjoyed this post, I’d be very grateful if you’d help it spread by emailing it to a friend, or sharing it on Google+, Twitter or Facebook.

Saturday, July 2, 2016

DIY Hair Detangler

Oh for years I bought the premade stuff. No more! It is so easy to make it yourself!

Seriously this is so easy it is embarrassing.

Ok ready?

  1. Take a spray bottle.
  2. Add conditioner.
  3. Add water.
  4. Shake it up.
  5. Spray on hair.
Ok so you want more details?

Here is my exact recipe:
  1. using a 4 ounce bottle
  2. add about 1 tablespoon of conditioner
  3. optional: add essential oils for hair health and to repel bugs (lice!) I use 3 drops of each: lavender, cedarwood, ylang ylang, rosemary and tea tree.
  4. shake well and spray directly onto hair
There you go! Now go untangle.

Blessings!

If you enjoyed this post, I’d be very grateful if you’d help it spread by emailing it to a friend, or sharing it on Google+, Twitter or Facebook.

Sunday, February 21, 2016

Everything is better with glitter! Lip balm with attitude


My daughter always asks for those flavored lip balms. You know the ones, marketed for kids. The ingredients list always makes me cringe. So over the years I've made her some lip balms and she accepted them-reluctantly. However she still wanted those "cool" ones. So recently we made tinted balm with sparkle and she is head over heels!!

Here is the recipe we created:

You will need:
6-7 lip balm tubes
1/2 tablespoon beeswax
1 tablespoon Shea butter
1 tablespoon coconut oil
2 capsules or 1/2 tsp vitamin E oil
1 teaspoon mica powder- approximately
10-15 drops essential oils of your choice (like lavender, or lavender and peppermint)

First melt your beeswax, coconut oil and butter in a double boiler.
Once melted remove from heat and add vitamin E, mica powder and essential oils. Stir the mica powder in really well! It does sink to the bottom. 

Gather your lip balm tubes with a rubber band for ease of filling. Slowly pour the balm into your tubes. Let it cool completely before capping.


Add cute labels or use decorative tape.

This is seriously so much fun. There are so many natural color combinations and essential oils you can choose from. If you try it out, let me know what you make. I hope you have fun with it!

Blessings!

If you enjoyed this post, I’d be very grateful if you’d help it spread by emailing it to a friend, or sharing it on Google+, Twitter or Facebook.

Tuesday, December 22, 2015

Loving your diffuser? Keep it running strong by following these guidelines...

Everyone LOVES their diffuser. They smell so wonderful, add to your health and make your home a spa!

Then there is the cleaning part. So yeah... I slacked on cleaning my diffusers. And now I am paying for it. My home diffuser is sadly not working, all because I did not follow some really simple guidelines. Don't make the same mistake. Show your diffuser some love and it will love you back.

1. Read the instructions. Different diffusers have different needs. I know most of us do not read instructions. I myself am a skimmer... However each diffuser is different~some have multiple functions.

2. Start slow. When adding oils to your diffuser, until you know what works best for you, start with less drops. You can always add more but if you have too much you will end up having to dump it out and starting over.

3. Know what kind of water is used. For example, tap or mineral water is used for the dewdrop, orb and bamboo diffusers. The home diffuser uses purified or distilled water. This is important because the diffusers are specifically made to work with or without the minerals in the water. Using the wrong water type will shorten the life of your diffuser.

https://www.youngliving.com/vo/#/signup/start?site=US&sponsorid=1639797&enrollerid=1639797
3. Know how to clean and how often. The home diffuser should be cleaned after each use and the leftover water discarded. This was my failure. I left the water in and added more...I won't do that again!

4. Know how to remove water/oils. Emptying the diffuser means you need to be aware of the ventilation holes. Tilting it in the correct direction will make sure you will not have oils or water go into the motor.

5. Do not overfill you diffuser. The diffusers have water level fill lines. You can go below it but do not go above it.

6. Clogged diffuser? Read about how to clean your diffuser in the manual that came with it. Here are some links to care instructions: orb, home diffuser and dewdrop. You can try cleaning it with water and rubbing alcohol and a soft sponge. Hopefully you can save it!

Unlike other brands, Young Living diffusers have a one year warranty! How awesome is that?? Young Living customer service is great at helping out if you do have any problems. My diffuser, badly abused lasted almost two years. But I am sure I could have had several more if I would have taken proper care of it.

For more diffuser comparisons and part numbers for each, see this handy comparison chart.

Looking for some great combinations to diffuse? Check these out...

Love your diffuser and it will love you back! Happy diffusing!
Blessings!!

If you enjoyed this post, I’d be very grateful if you’d help it spread by emailing it to a friend, or sharing it on Google+, Twitter or Facebook.

Saturday, December 5, 2015

Five more DIY gifts for Christmas using Essential Oils

This years "Christmas Make and Take" was a ton of fun. I took it up a notch with some of our projects. We made gifts which were a little more time intensive but overall are fairly easy and truly make great gifts for everyone on your list.


Comfort and Joy Lotion Bars: First up is my all time favorite lotion bar. I have been gifting these for years and I always get tons of compliments. These bars were seasonally scented with Joy and Orange essential oils to create a fun and luxurious bar. They are great for dry cracked skin. Rub them in your hands and the heat from your body will melt the oil. These bars are very moisturizing. I get cracked skin along my finger nails in winter and I will rub my lotion bar on the cracks at bedtime. By morning the crack will be gone.

You can use lots of options to make this with different molds. I use a small loaf silicone mold but you could make hearts for Valentines, silicone muffin mold for round shapes as well!

You will need:
1 cup beeswax
1 cup mango butter
1 cup coconut oil
1-2 tsp vitamin E oil or about 5 capsules of vitamin E
50 drops of essential oil- for this project we used 25 drops of Joy EO and 25 drops of Orange EO

In a double boiler melt the beeswax, mango butter and coconut oil. Once melted, remove from heat and add Vitamin E and essential oils. Then pour into molds. Let completely cool before removing from mold or if using deodorant containers make sure it is cooled completely before adding the cap.

Using the mold above I generally get 10-11 bars.

Essentially Infused Sea Salt Trio:Second we made Essential Infused Sea Salts in Rosemary, Basil and Oregano. I found some super cute jars (wedding favors) and some great coordinating stickers and boxes.

1. Rosemary bowl combine: 2 level Tablespoons sea salt with 1 drop of Rosemary EO
2. mix well then add 1 level Tablespoon dried Rosemary
3. mix in bowl and then scoop/pour into jar with a funnel
4. place the cover and label it, repeat with each herb, (keep separate bowls for each herb)


Diffuser Bracelet:Third up is diffuser bracelet. Using natural stones, Amazonite and Lava we created super cute bracelets and paired it with a mini dropper bottle so each person could share their favorite scent with the receiver.

1. Cut 9-10" of magic cord (1mm)
2. use 16 amazonite stones (8mm) and 3-5 lava stones (8mm or 10mm) to make your bracelet (don't fill the string or you won't be able to tie it!!!
3. triple knot it (hardest part)
4. put one dab of superglue on the knot
5. once dry, cut ends.

White Christmas Bath Bombs:These Luxury Bath Bombs with White Angelica EO and Lavender EO were like heaven....oh they smelled sooooo good. When you are ready to use them, fill your tub, climb in and drop in the bomb!

1. Combine in a large glass or stainless steel bowl until well blended: 
  • 8 ounces Baking Soda for your skin and the bathwater
  • 4 ounces Corn Starch
  • 4 ounces Epsom Salts
2. Add the following ingredients and blend well: 
  • 2-3 tsp. witch hazel
  • 15 drops of Essential Oil for scent (more or less depending on how strong you want it and what scent you are using)
  • 2 tsp. almond oil for your skin
  • Food coloring if you want colored bombs and water.
3. At this point, your mixture should resemble wet sand.  Adding the food coloring helps you figure out if it’s well-mixed, an even color means a good mix.  When you squeeze some in your fist, it should hold together.  If it doesn’t, add witch hazel a teaspoon or less at a time until desired consistency is reached. ***Don't add too much liquid or it expands... a lot.

4. Add 4 ounces Citric Acid (this is what gives you the fizz). Mix well, but use a spoon for this because the pure citric acid can irritate your skin.

5. Once well mixed, tightly pack it down into your mold.  Let it dry 24 hours in the mold before removing.


Christmas Spirit Scented Soap: Finally we made Christmas Spirit Scented and swirled soap. I have wanted to do a soap for a long time. We used a glycerin melt-and-pour soap with shea butter. Its important when shopping for soaps that you look at the ingredients and choose one that you are comfortable with. 
  1. Chop the soap into cubes and melt slowly in a double boiler or microwave. 
  2. Once melted, remove from heat and allow to cool slightly. 
  3. Add your essential oils and mix well. (We used approximately 5ml bottle of Christmas Spirit for 2 1/2 pounds of soap.)
  4. Pour into molds.
  5. Let it set slightly, when a skin starts to show on the top is the best time to add liquid soap colorant. I used 5-7 drops in each muffin cup. stir slightly with a popsicle stick.
  6. Spray with rubbing alchohol to break surface tension and pop a y bubbles. Leave to cool and harden. Do not place in fridge to speed it up- this will result in sweaty soap.
  7. Once completely cooled wrap in saran wrap.
  8. This recipe made 12 bars of soap, but will vary depending on molds you use and how much you fill them.
Let me know what you are making this Christmas. I would love to hear about it!
Blessings!!

If you enjoyed this post, I’d be very grateful if you’d help it spread by emailing it to a friend, or sharing it on Google+, Twitter or Facebook.


Thursday, October 8, 2015

Bath Tea, the no mess way to enjoy a spa like bath


So who does not love the idea of the beautiful bathtubs with rose petals and wonderful spa scents... until you realize you have to clean it up. Well, worry no more! You can make bath tea! This was so easy to make and it smelled and looked wonderful. This would make a great gift for teachers, friends and family. Just place three bags into a box or mason jar with some simple instructions. 

Ingredients:
1 cup Epsom salt
1/2 cup oatmeal (finely ground in food processor)
1/2 cup powdered milk (whole preferred)
2-4 T dried flowers (I used rose petals and calendula from my garden)
8-10 drops essential oils (I used Lavender)

Directions:
Mix the ingredients together in a large bowl.  Scoop carefully into extra large tea bags and tie shut. You can add a tag if you like as well. To use, place one tea bag in tub before running water. If you don't mind the clean up feel free to open it and pour contents into your tub.

Don't forget to grab a good book and light a candle or seven. Take some time to really relax and enjoy it. Let me know how you liked it!

If you enjoyed this post, I’d be very grateful if you’d help it spread by emailing it to a friend, or sharing it on Google+, Twitter or Facebook.


Blessings!

Tuesday, October 6, 2015

Kids Bedtime Spray


I recently hosted a Back to School Make and Take and one of the things we made were bedtime sprays. We had two options for them to choose from. They were also invited to decorate the bottle with stickers, markers, etc. to make it their very own.

A good nights sleep is a great way to help your little one start their day. Some kids have problems falling asleep because of fears.  Monsters or other nighttime fears can be hard to rationalize with little ones. I have found its better to acknowledge the fear and give them something to help overcome it. Monster spray can be a great help here! White angelica has really helped our family in this area. Lavender and white angelica is what I used with my little guy when he was waking in the middle of the night with night terrors. He loved to spray it on his pillow and blanket and he no longer woke screaming in the night. (happy mama)

Some kids have trouble staying asleep or may wake up really early. Cedarwood is a great scent and can help extend the sleep cycle.  I really have fallen in love with it. In fact, lavender and cedarwood is what I use nightly in my diffuser. (You don't have a diffuser? Then, we need to talk!)


Monster Away Spray or Sleep Spray:
1.  place 2-3 drops glycerin in bottle
2.  10 drops of lavender
your choice of:
o    5 drops of White Angelica (monster) or
o    5 drops of Cedarwood (extended sleep)
3.  add approx 1 ounce distilled or purified water
4.  top off with approx. 1 ounce witch hazel or 100 proof alcohol
5.  add top and shake well
6.  decorate sticker and add to bottle!
7.  spray on linens (or monsters) before bed

Involve your kids in making it and I hope you enjoy a restful night sleep!

If you enjoyed this post, I’d be very grateful if you’d help it spread by emailing it to a friend, or sharing it on Google+, Twitter or Facebook.

Blessings!!


Thursday, July 30, 2015

Empty bottles? Don't toss them! How to clean and reuse your essential oil bottles

Many times I have been asked, "What is the best roll on?" My personal favorite is to make your own with the Young Living bottle the oils came in and the roller fitments from Young Living. (My first roll on was born when I reached the bottom of my lavender bottle.) These bottles are free, they do not leak and the metal roller applies the oils perfectly.

Lets talk about some ways your can get every drop from your oils and how to clean the bottles to reuse them. I had several bottles which were empty. Here are some of the things I did:

When I have needed a roll on of the oil or a blend that included the essential oil I had just emptied I just used it as is. I remove the top add a carrier oil and the drops needed of essential oil. Then add my top.

The relaxing essential oils like stress away, peace and calming and lavender I take the tops off and bury them in epsom salts. The oils get absorbed into the salts. Those salts are used for baths for the family. Once I am done with them in the salts, I can then clean and resuse the bottles. You can also make other jars of bath salts for other purposes like for energizing or to alleviate aches and pains.

I decided to keep my empty peppermint for use at the gym. To give myself a boost I can open the bottle and breathe in the energizing goods.

I had several other bottles which I had previously removed the reducer to get the last drops out. (Yes there still is a few drops in there!)

The deep relief bottle was the messiest.
Once I have a bunch of bottles I need to clean, I remove the tops and reducers (for more on an easy way to do that see this post). Then remove the labels. They come off real easy. I use my homemade gunk remover to get the last of the sticker residue off. I put the gunk remover on and let it sit for a few minutes, then rub it off with a paper towel.

Once the outside is clean, it is time to clean the inside. Remove the rings and dropped them into hot water while I clean the rest of them. I let them soak a little, then rinse them. Finally, soak with hot water and all natural dish soap to remove the last of the oil. Rinse them well and let them air dry. Now they are ready to be reused.


So, what have you used your bottles for? I love to have these on hand to whip up a blend or roller bottle or to bless someone else with essential oils. A super simple way to share the love of good health.
Blessings!

If you enjoyed this post, I’d be very grateful if you’d help it spread by emailing it to a friend, or sharing it on Google+, Twitter or Facebook.

Monday, June 22, 2015

Green Your Clean Series! Your body products


So far, we looked at a few areas of the home: the bathroom, the laundry room and the kitchen. Now lets wrap this up and take a look at how you may green up your personal body products.

When you look at all the things you put on your body, the chemical load can really add up. Lotion, shave gel, soap, shampoo, conditioner, mousse, hairspray, foundation, eye shadow, toothpaste, deodorant... I could go on and on. Look at the ingredient list on just one of those products...pretty crazy huh? 

I do not recall exact order I took when changing over products. It was one thing at at time. Taking the first step. Mostly I looked for stuff I could replace (and still be satisfied with it) without paying a ton of money for. This is how I ended up making most of my stuff (much cheaper) and ultimately what led me to Young Living.

Here is a little list of things I have done and hopefully you will find some you can try crafting. You can change the essential oils used for the scent or benefit you desire.

Foaming Shave Soap - love this stuff!

Sugar scrub - great exfoliant

Foaming Hand Soap - this can also be used in the shower or bath

Deodorant - no stink here!

Bath salts also here - so many options!

Roll on Perfume

Lotion Bar

Face Serum - replaces my face moisturizer
Magnesium Oil - great way to get your magnesium

Baby wipes - not just for babies, works great for clean ups of many kinds!

Waterless Hand Sanitizer - oh, this stuff is the bomb!

Here are two new things I have done that I have not talked about before:

Thieves Toothpaste: I made this one last year. Pretty simple to make. If you try it let me know what you think. This recipe makes a small amount which is nice, since you do not need much.

What you will need:
1/2 tablespoons bentonite clay
1/2 tablespoons coconut oil
1/4 teaspoon sea salt - finely ground
1/2 tablespoon hot water
4-5 drops Thieves essential oil


Stress Away and Lavender Whipped Body Butter: This is awesome for all over lotion. I have made it with a few different essential oils but I think stress away and Lavender are my favorite combinations.

What you will need:
1/2 cup coconut oil
1 cup mango butter (or shea butter or cocoa butter or a mix or each)
1/2 cup sweet almond oil
1 teaspoon vitamin E oil
essential oils of your choice! (I put in 10 of each stress away and lavender but I do love my oils!)

Melt the coconut and butters in a double boiler. Remove from heat and add almond oil, vitamin E. Chill in fridge for 1-2 hours until it starts to solidify. Then mix in a stand mixer with the whip attachment to get it a whipped consistency. It will take several minutes. Add essential oils and mix them in. Store in a jar on your counter. (If your home it really warm it may melt but you can always whip it back up.)

So what do you want to replace? What have you tried? What is missing from this list?
Where ever you decide to start, have fun playing and enjoying all your chemical free body products.

Blessings!

If you enjoyed this post, I’d be very grateful if you’d help it spread by emailing it to a friend, or sharing it on Google+, Twitter or Facebook.

Saturday, June 6, 2015

Do you oil your hair?


Hair oiling. When I first heard the term I thought it sounded strange but really when I think about it I have been doing it for quite some time. Long ago I would do "hot oil treatments." And for the last 5 years I have been oiling my hair.

Recently I have decided to add more oiling to my routine. I spent a ton of time researching hair oiling. Since my son was born I have seen thinning of my hair and more recently an oily scalp. (I have started to work on my hormone imbalance but that is another post.)  

I have found three main ways to oil my hair. First as a styling product, like I have been doing for years. Second as an intense moisturizer on the ends. Third is oiling the scalp which concentrates on the hairs roots to help with healthy hair growth.

Styling:
As part of my efforts to get rid of chemicals in my beauty routine I got rid of my detangler and moose and started using argan oil. This small step made a big difference in my hair. People would say, "did you color your hair?" or "did you get a hair cut?" or "your hair looks great, what did you do?"  Well, I do color my hair and have been for a long long time. As a result it was dry, dull and needed help. And before you say it-yes yes I know there are chemicals in hair dye...but you have to pick your battles. Coloring is one (along with my hairspray) I have not been able to part with, yet.

After the shower, I use a small dime size amount in my wet hair. I concentrate on the ends and blow dry. (Beware as a little goes a long way... Use too much and you will have oily hair.) That is it! Easy right?

Root serum:
I found out there are great and inexpensive essential oils that are great for healthy vibrant hair. So, I have added a root serum and hair oiling to my routine (prior to shampooing) one to two times a week. I am seeing amazing results. My hair is shinny and so soft. It is still too early to say if it's made a huge difference in hair growth but I think it is looking pretty good. 

The root serum is my primary mode to focus on the overall health and growth of my hair, the roots is where is comes from right?!  I researched essential oils that are best for this and I chose to use cedarwood, rosemary and lavender. All of which help with hair health. I also choose to use grape seed oil in my root serum as a carrier and due to excess oil on my scalp. 

The night before I am going to wash my hair is when I use my root serum. I want it on my scalp as long as possible. I do it right before bed as part of my bedtime routine. I put the serum on my scalp using a glass eye dropper. I let it coat my scalp and try not to get it into my hair because I really want it on my scalp since that is where the hair comes from and I also want to avoid getting oil on my pillow. I have not had any problems with oily pillow case but you may want to keep that in mind if you do it,

Intense moisturizing:
In the morning (before shampooing) I occasionally oil my hair. I have long hair so it can use all the help it can get to stay healthy. I moisturize the ends for the dryness and overall health of the hair. In my research I found a really good article here about different oils to use for oiling your hair based on hair type. Based on my hair type I choose to use sweet avocado oil. I put about 3-4 table spoons of it in my hair, I focus on the ends and anything lower than my ears. I brush it in when I am done.  I try to let it soak in a good hour before washing. The longer the better. This could also be a "hot oil treatment" if you heated up the oil slightly... but yeah.. I have not done that.

Then shampoo, condition and argan oil as usual. 

What have you tried? I would love to hear about it!

Blessings!

If you enjoyed this post, I’d be very grateful if you’d help it spread by emailing it to a friend, or sharing it on Google+, Twitter or Facebook.

Wednesday, June 3, 2015

DIY After sun care

Summer is on us and so is the sun. We all need our vitamin D but we also need to be watchful for the burn that can come with sun exposure.

There are several ways you can soothe your sunburn naturally. Here are a few:
  • Cool bath with baking soda or oatmeal
  • Green tea soak
  • Aloe
  • Witch hazel
  • Apple cider vinegar
  • Raw honey
  • Lavender
  • Colloidal silver
  • Plantain leaf tincture
  • Peppermint

If you get too much sun you may need some after care to soothe your skin. I find this after sun care spray absolutely amazing. It feels wonderful and is so refreshing. Plus it helps the pain and burn!

We made this at a recent make and take and have really enjoyed it.

In a 2 ounce spray bottle you will mix:
1 tsp witch hazel (I prefer this one)
5 drops lavender essential oil
Then top off with aloe gel (I like this one)

Cover and shake. Store it in the refrigerator or toss it in your cooler when you are out. It will be ready when needed.

Stay safe in the sun. And if you need it, I hope you enjoy it!

Blessings!

If you enjoyed this post, I’d be very grateful if you’d help it spread by emailing it to a friend, or sharing it on Google+, Twitter or Facebook.

Sunday, May 10, 2015

Pop the top! Its easier than you think!

So many ladies are telling me they have a hard time getting the tops off their Young Living Essential Oil bottles. Save your nails and your sanity!! There really is an easier way.

Use your cap to remove the reducer easily. You will keep it clean since you will not be touching it and there will be no nails harmed!

Putting the roller filament on is easy too! Just set it in place and screw the top all the way on. It will snap into place automatically. The roller can also be removed the same way you removed your reducer.


I am not the best at video but thought it would be needed here. So please be kind.


Try it out and let me know how it goes for you.

Blessings!

If you enjoyed this post, I’d be very grateful if you’d help it spread by emailing it to a friend, or sharing it on Google+, Twitter or Facebook.

Sunday, April 26, 2015

Waterless Hand Sanitizer you will fall in love with!


No lie. You are going to LOVE this stuff!

I created this one about a month ago for a spring cleaning make and take. Since then I have been making everyone try it. So many people fall in love with it instantly and want the recipe. So I'm finally getting around to posting it.

I love it soooo much! And it is so easy!


Some things to note: I use organic witch hazel because I wanted to avoid the harsh alcohol in the regular stuff. I also use a food grade aloe gel so there are no additives. This is the same aloe and witch hazel I use for other things like baby wipes. The essential oils I choose here are great for skin and have antibacterial properties...win win!

So here is what you need....

Approximately 2 ounces of Aloe Gel (I like this one)
1 tsp Witch Hazel (I prefer this one)
5 drops Melaleuca Alternifolia essential oil
5 drops Lavender essential oil
2 ounce Container (I found these at Target)

In your container pour in 1 teaspoon of witch hazel. Add approximately 2 ounces of aloe gel, leaving enough space for your essential oils. (you can always add more aloe to top it off) Then add your essential oils. Put on the top and shake to mix. Done!

I love this. It makes you hands baby smooth. Plus it can also work as a quick wound cleaner in a pinch. Great for your on the go tool kit.

Blessings!

If you enjoyed this post, I’d be very grateful if you’d help it spread by emailing it to a friend, or sharing it on Google+, Twitter or Facebook.

Friday, April 24, 2015

Green Your Clean Series! The Bathroom

This week we venture into the great abyss... otherwise known as the bathroom. I HATE cleaning the bathroom. I loath it. I used to pay people just to come dust and clean my bathrooms because I hated it so much.

The bathroom is a place where you can find lots of "specialty" chemicals. But really its is simple and you don't need them.

Here are some great options:


Clogged Drain? I hate liquid drain cleaners. They just scream kill me now. I do love the action of seeing things fizzle. So here are the two ways I clean my drain.

1. Fill the drain with baking soda. Maybe a cup or so? Get it down in there as much as possible. Then pour vinegar in the drain and plug it up immediately. The fizz will force the clog down and clean the drain too.

2. A hand held plunger is an powerfully awesome way to remove a tough clog. I found one at the local hardware store about a year ago and wanted to shout from the roof tops. It was the best thing since??? well. I loved it anyways. I did find if you have an overflow hole in your sink you need to cover it with your hand to create a good suction. But it works on the really tough stuff. No chemicals needed!

Cleaning Paste: use baking soda and water to make a paste. Works great for cleaning the sink, toilet, shower, tub. Anywhere you need a little scouring power. Add in some extra power and a great scent by using essential oils. 

Some common oils used for cleaning are: 
  • Lemon- kills bacteria and will uplift your mood :)
  • Thieves- antibacterial, antifungal, antiseptic, antiviral, antiparasitic and antimicrobial.
  • Purification- antiseptic, antibacterial, insecticidal, antifungal, antiviral and purifying!
  • Mel-A- antiviral, antiparasitic, antimicrobial, antifungal, antiseptic, bactericidal, and insecticidal
  • Citrus Fresh- antifungal and antiseptic
  • Lavender - antiseptic, antiviral, bactericidal, and fungicidal
  • Peppermint- antiseptic, antibacterial and antiviral


Daily Shower Cleaner Spray: this is for in between cleaning. To help keep it clean and reduce build up. Mix in a bottle and keep it in your shower for daily use. I like to write the recipe right on the bottle for easy refill.

1.5 cups water
1 cup white vinegar
1/2 cup rubbing alcohol
1 teaspoon liquid dish soap
15 drops lemon essential oil
15 drops melaleuca (tea tree) essential oil


Toilet Bombs: this is my newest venture in the bathroom. I had a silicone mold to make bath bombs and decided to try this out. My son loved the smell. Way better than breathing in toxic fumes- even from the natural stuff from the store.

1 1/2 cup Baking Soda 
1/2 cup Citric Acid
essential oils

Mix the citric acid and baking soda in a glass bowl. Slowly add approximately 80 drops of essential oils (your choice from list above). I personally love the smell of Citrus Fresh, Lemon and Mel-A together. Mix well. Push mix into mold. It should be slightly wet like damp sand. If needed you can spray a couple spritz of water to help it dampen but remember any water added will take away some of the fiz later. Leave in mold to dry for approximately 24 hours then remove from mold and store in a glass jar. When ready to use drop into toilet! (I use 2 because I have small molds) I drop it, clean the rest of the bathroom while it fizzes. Then I use my scrubber to scrub anything. Then I leave it to soak in the toilet- until it gets used anyways. I do the same with the gel from the store and have noticed no loss in cleaning power and only have been happy to enjoy the pleasant aroma and know my kids are safe.


All Purpose Cleaner: As I mentioned previously in this series. The All Purpose Cleaner is a must. This is one area where you can go crazy and spray away. Spray your mirrors, sinks, counters, toilets, even floors.


There you have it. Some fun new and natural ways to clean your bathroom.

Blessings!

If you enjoyed this post, I’d be very grateful if you’d help it spread by emailing it to a friend, or sharing it on Google+, Twitter or Facebook.

Saturday, March 28, 2015

Cranberry Tangerine Scones and Citrus Fresh Fruit Dip

I love trying new things. One thing I do not try enough of is new foods. Having a house full of picky kids is not conducive to the excitement of "new." So I took advantage of having some friends over and made a couple new things that I really loved! I hope you enjoy!

Cranberry Tangerine Scones
Scone Ingredients:
2 cups all-purpose flour
1/3 cup sugar
1 teaspoon baking powder
1/4 teaspoon baking soda
1/2 teaspoon salt
8 tablespoons butter, cut into pieces and then frozen
1/2 cup dried cranberries
1/2 cup sour cream
1 large egg
Tangerine Essential oil

Icing: Mix about 1 cup powdered sugar and 2 tablespoons water--enough to make it thick but drizzly. Add 5 drops tangerine. Mix well. Drizzle on cooled scones with a spoon.

1.      Preheat oven to 400 degrees.
2.      In food processor, mix flour, sugar, baking powder, baking soda and salt.
3.      Add frozen butter and blend until butter is well incorporated (pea size or smaller)
4.      In a small bowl, mix sour cream and egg until smooth. Add 8-10 drops Tangerine Essential Oil.
5.      Add liquid mix and cranberries to food processor. Pulse until is incorporated and becomes a ball. (does not take too long)
6.      Place ball of dough on a lightly floured surface and pat into a circle about 3/4-inch thick. Sprinkle with about 1 tsp. of sugar. Use a knife to cut into 12 triangles; place on a cookie sheet lined with parchment paper.
7.      Bake until golden, about 15 minutes.
8.      Let cool then drizzle with icing.

      Citrus Fresh Fruit Dip:
4 ounces of cream cheese
4 ounces of marshmallow cream
1/2 tsp vanilla
3-4 drops of citrus fresh
blend well and serve with fresh fruit


Blessings!

If you enjoyed this post, I’d be very grateful if you’d help it spread by emailing it to a friend, or sharing it on Google+, Twitter or Facebook.